It is hard to believe that the season is half over….the days are noticeably shorter, the colors in the garden are changing and space is opening up as crops are harvested and we don’t have the frenzied pace to replant. We find ourselves reflecting and already pondering next season. We are thrilled with the success of so many crops. The peas were our best ever and so was the onion harvest.

Storage onions drying in the greenhouse.
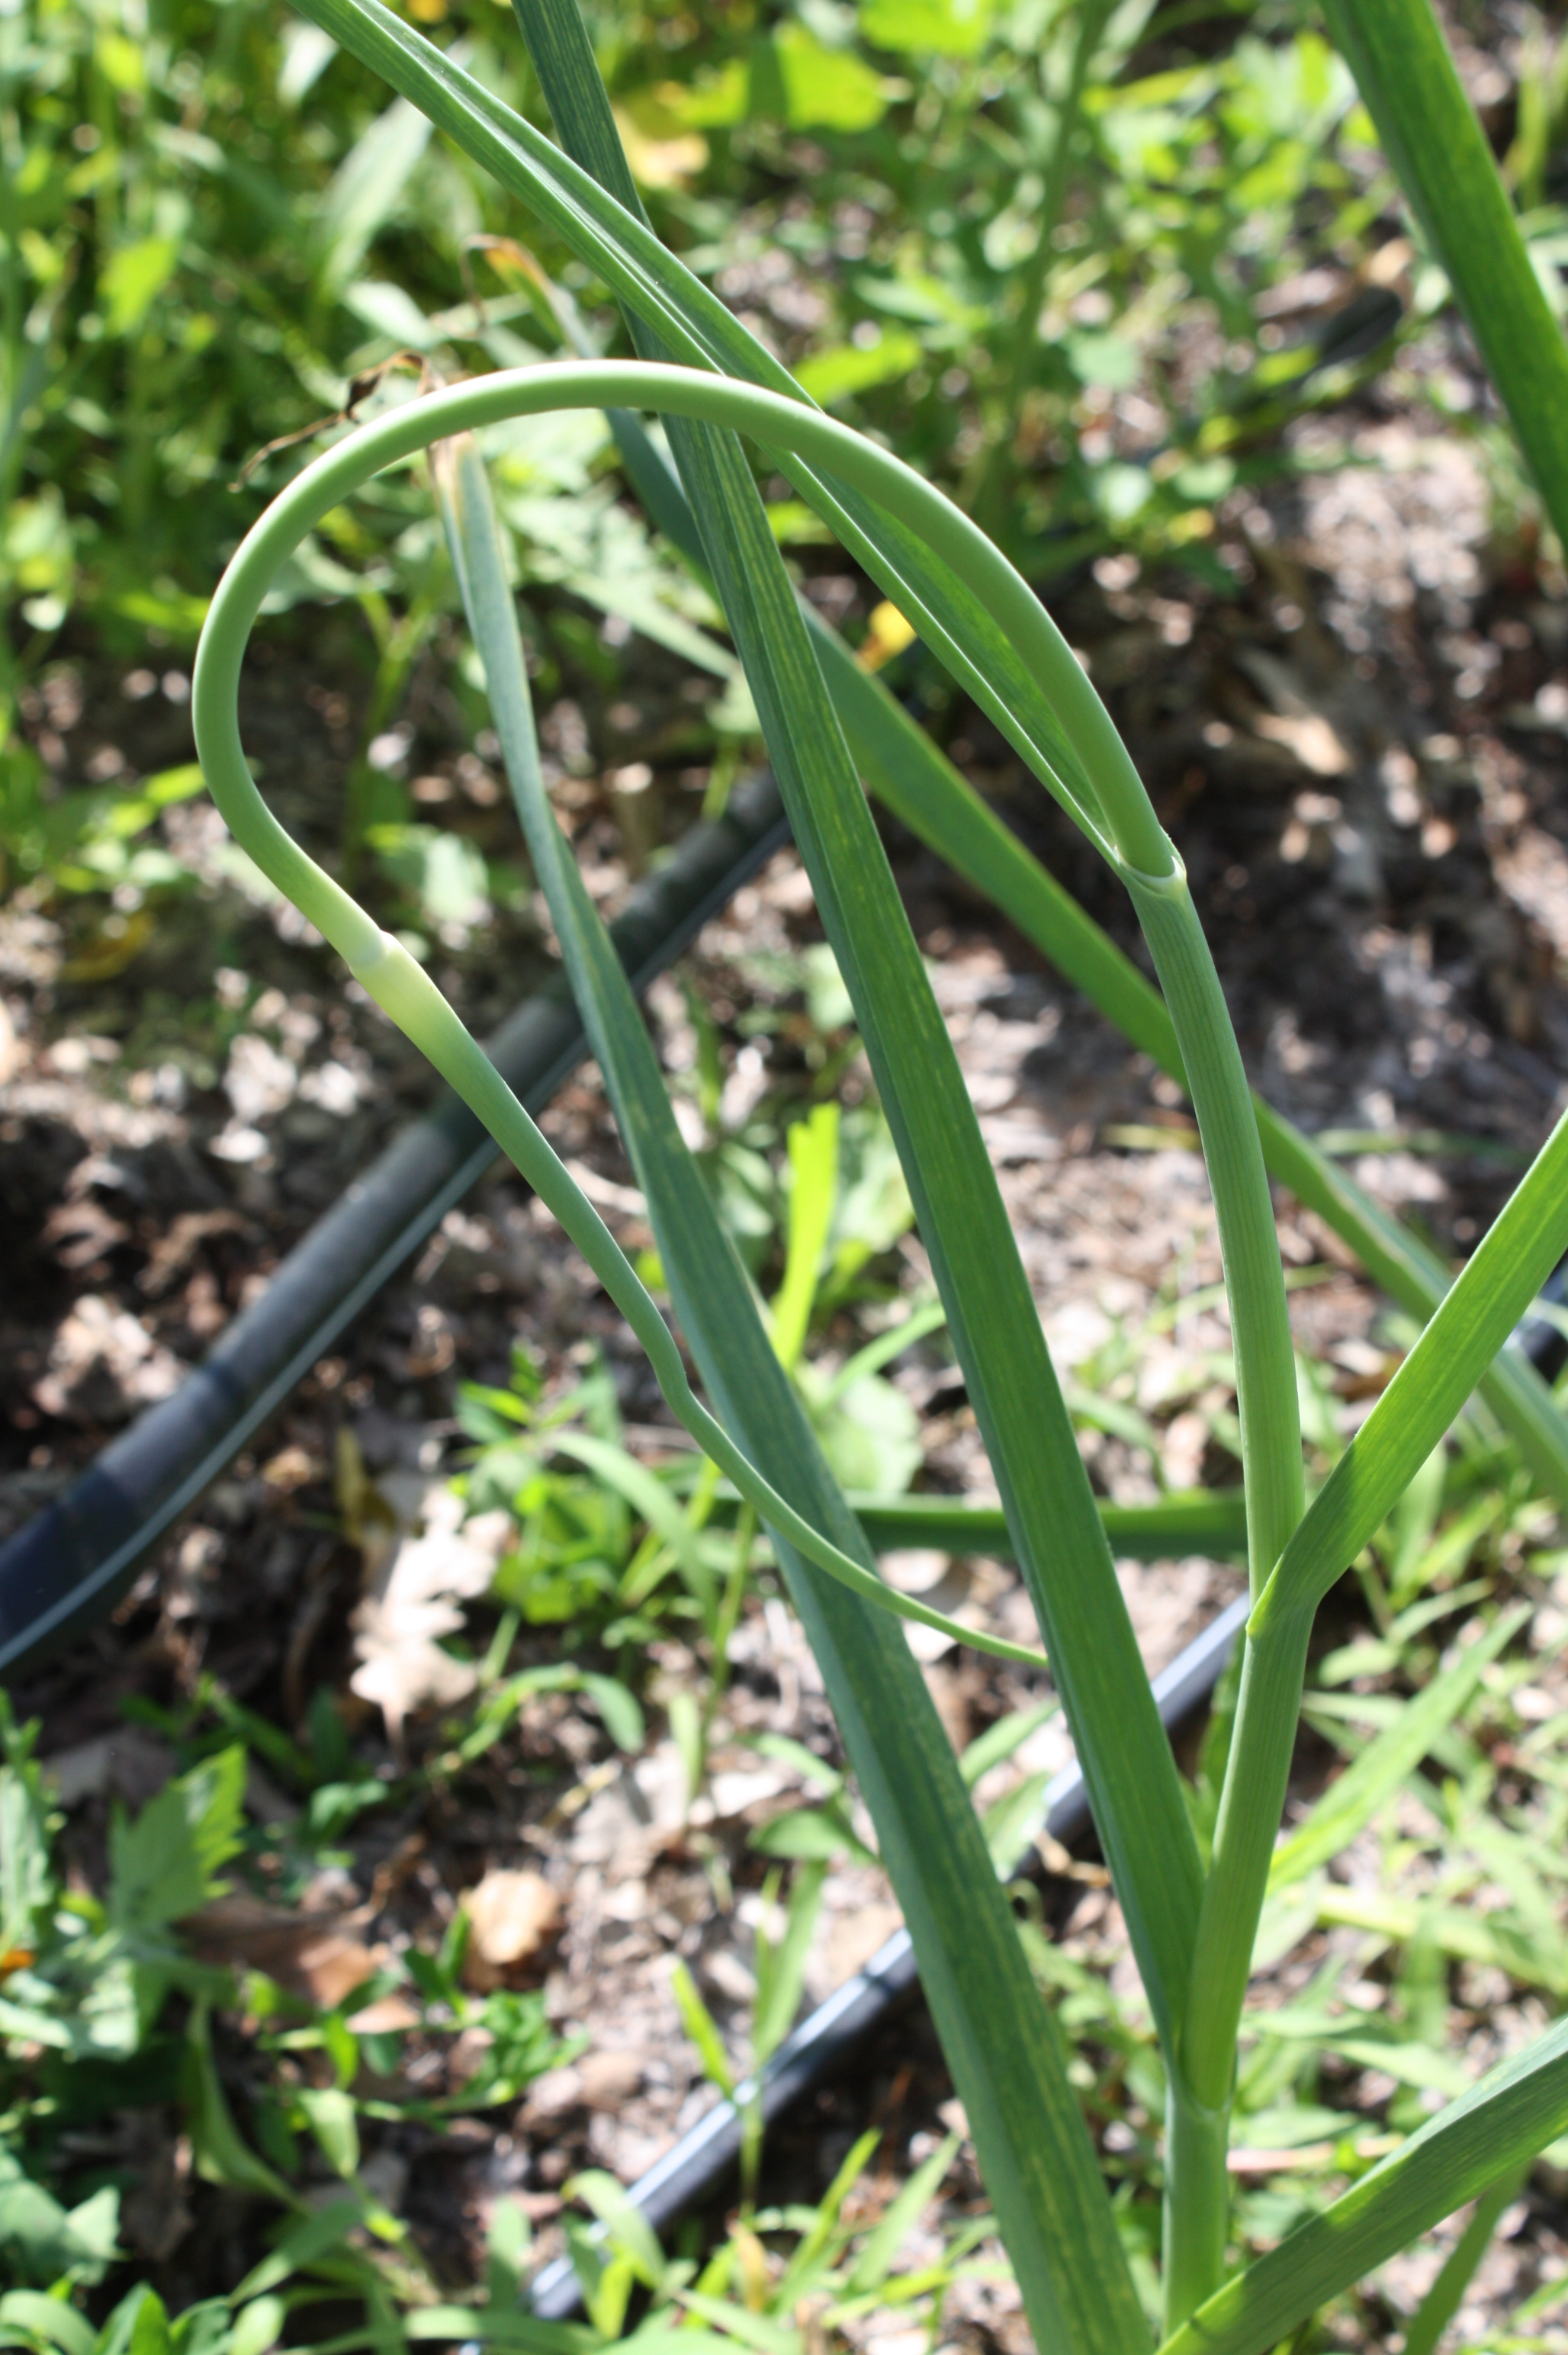
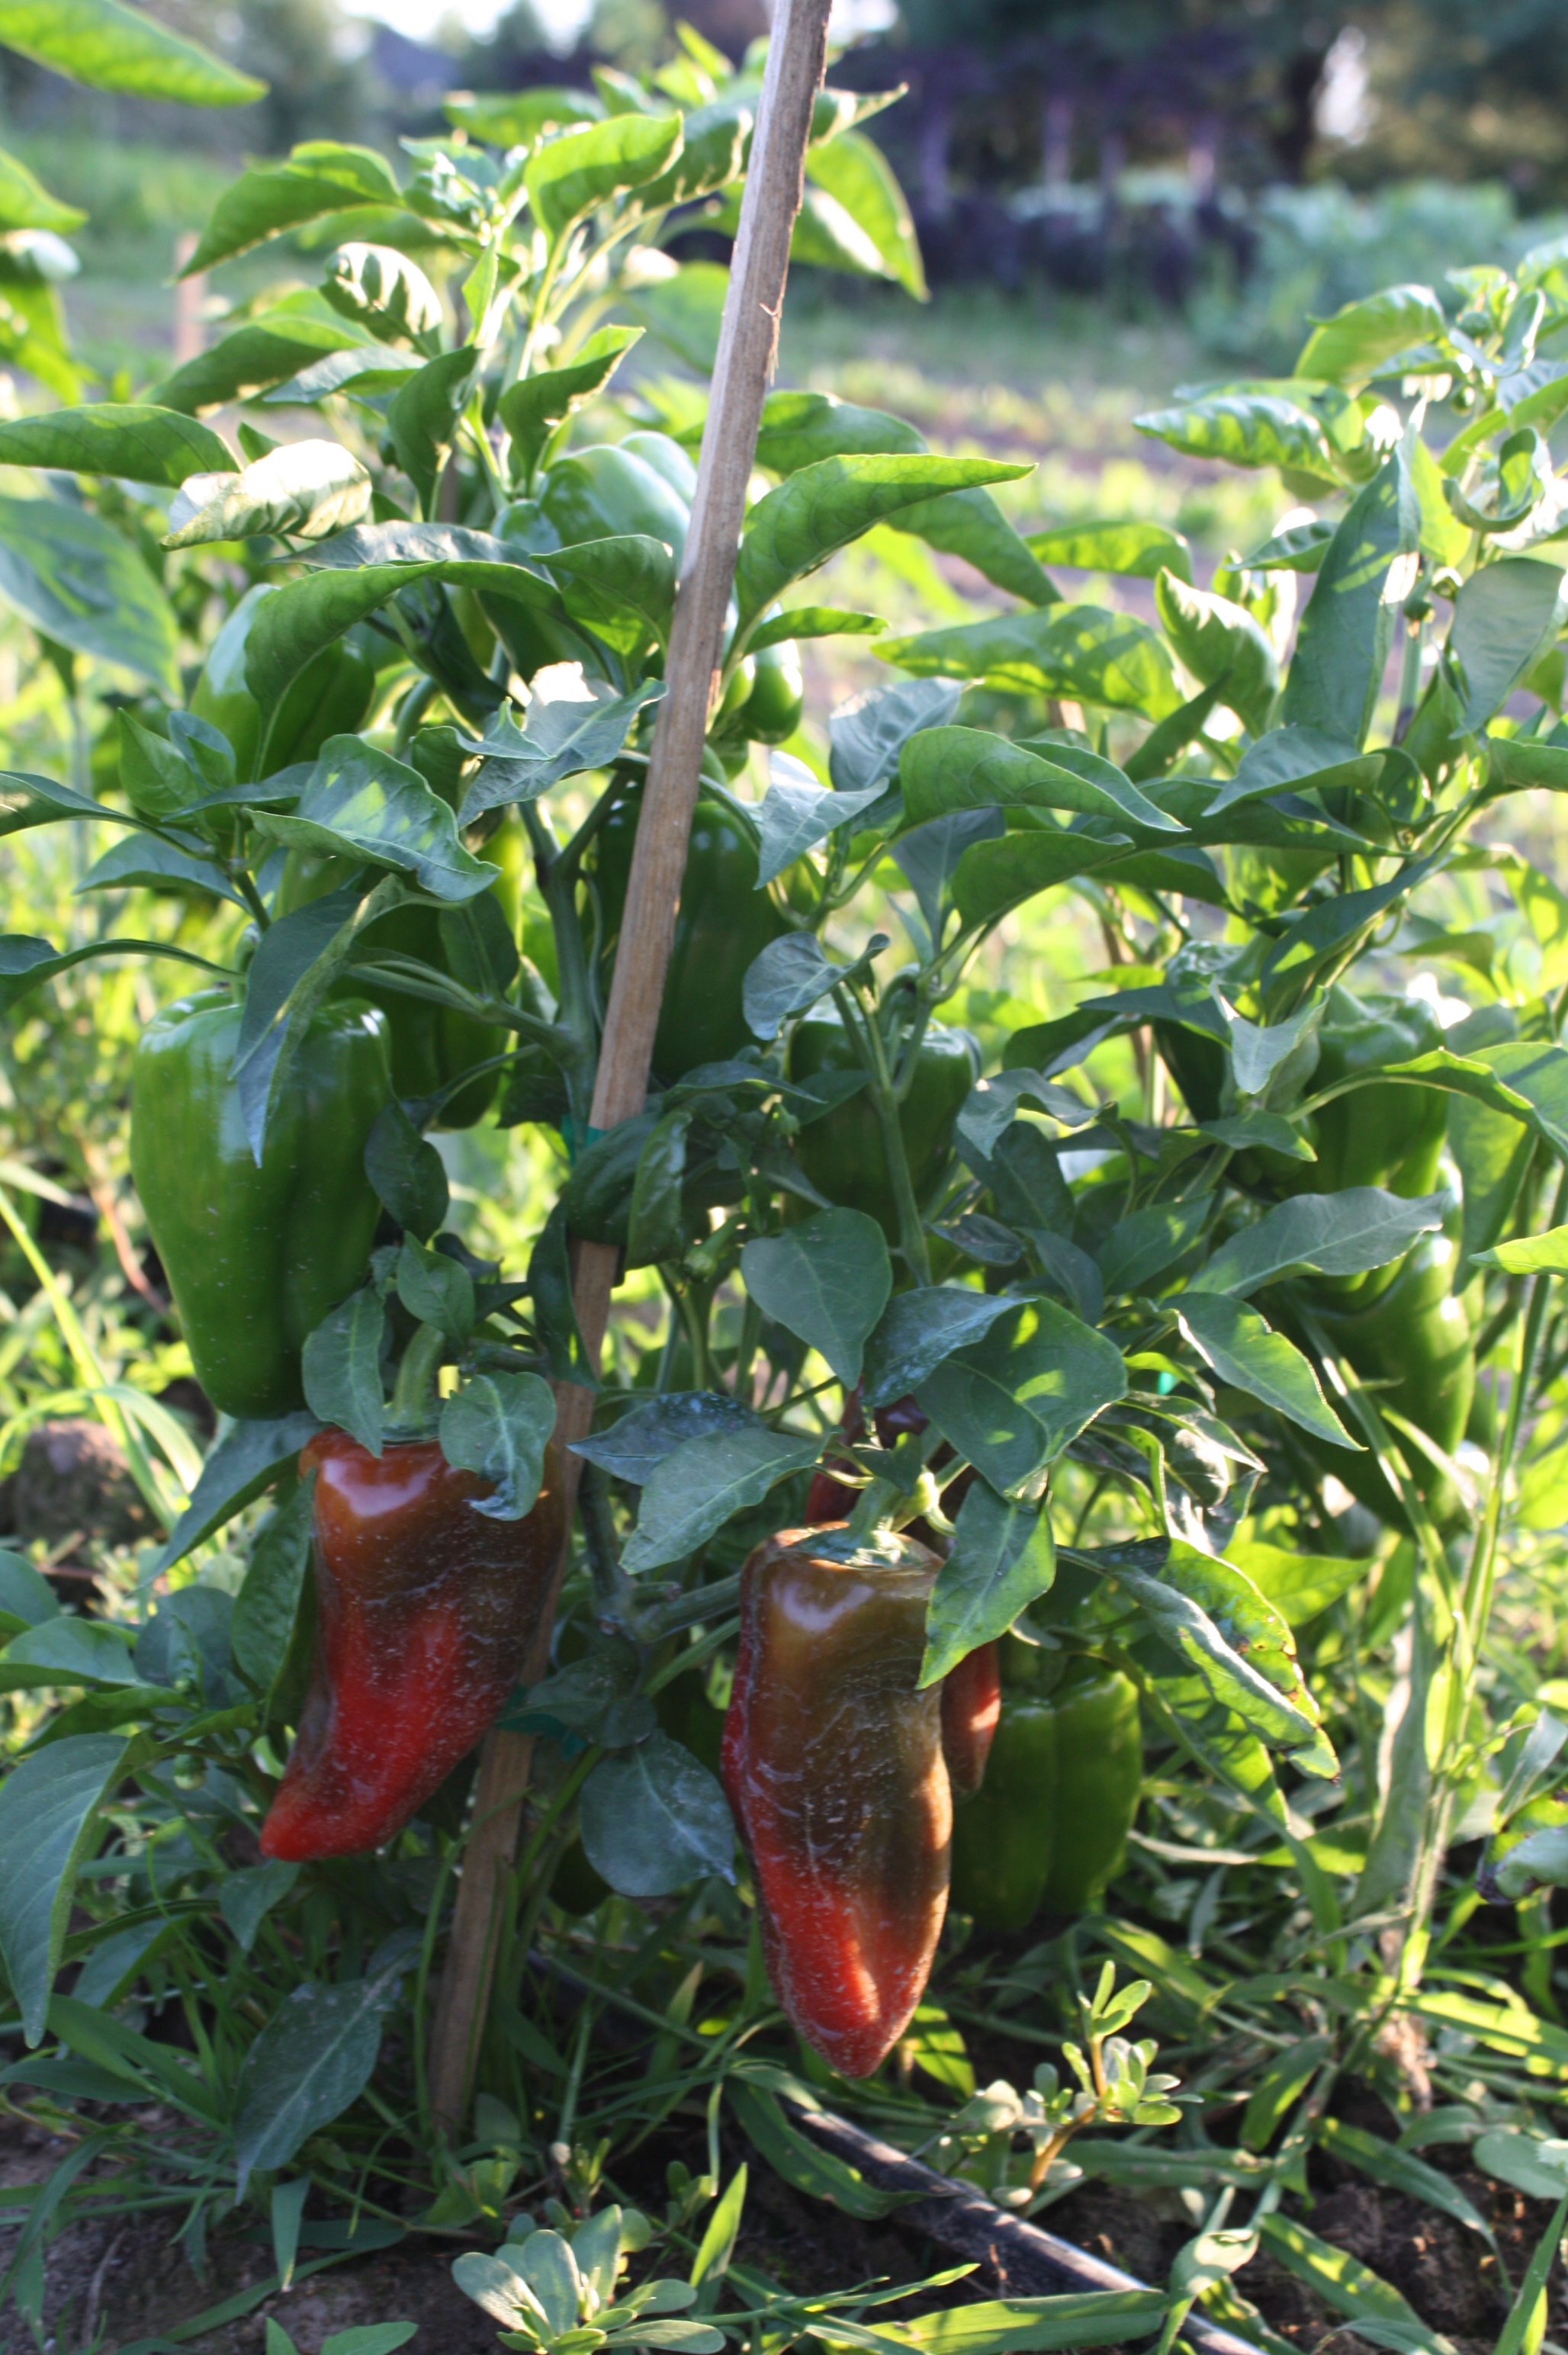
Garlic is gorgeous and drying in the shed. Our zucchini and cucumbers are power houses and continue to chug along. The pepper plants are loaded! We are amazed the plants recovered from the slow start of the cold, wet, prolonged Spring.
Sweet Carmen

Sweet Carmen not yet ripe.
Lettuce has flourished in the cool temperatures of this summer.

Lettuce garden. The center was planted this week and the leaf lettuce cut this week from the right.
Our potato harvest is bountiful and we are optimistic about many of our Fall Crops.

Turnips, and radishes and beets.
Tomatoes are the only crop that has really suffered the effects of all this cold. The are doing their best and making a good showing but not the crop of last year. We are grateful for what we have. The Cherries are bountiful, Paste tomatoes are lush on the vines if they ever get the opportunity to ripen and the Slicers are there too just not in the volume we had hoped. We are beyond terrified about late blight that seems to be creeping closer and have heard the horror stories of gardens where the entire tomato crop goes down in 7 days. The watermelon crop is “hanging out” as well this year. Almost 4 weeks behind last weeks harvest. So hard to tell and always a disappointment when one is cut too soon. I’ve cut 3 melons to check and the insides are pink. We are almost there and there are tons of the beauties out there.
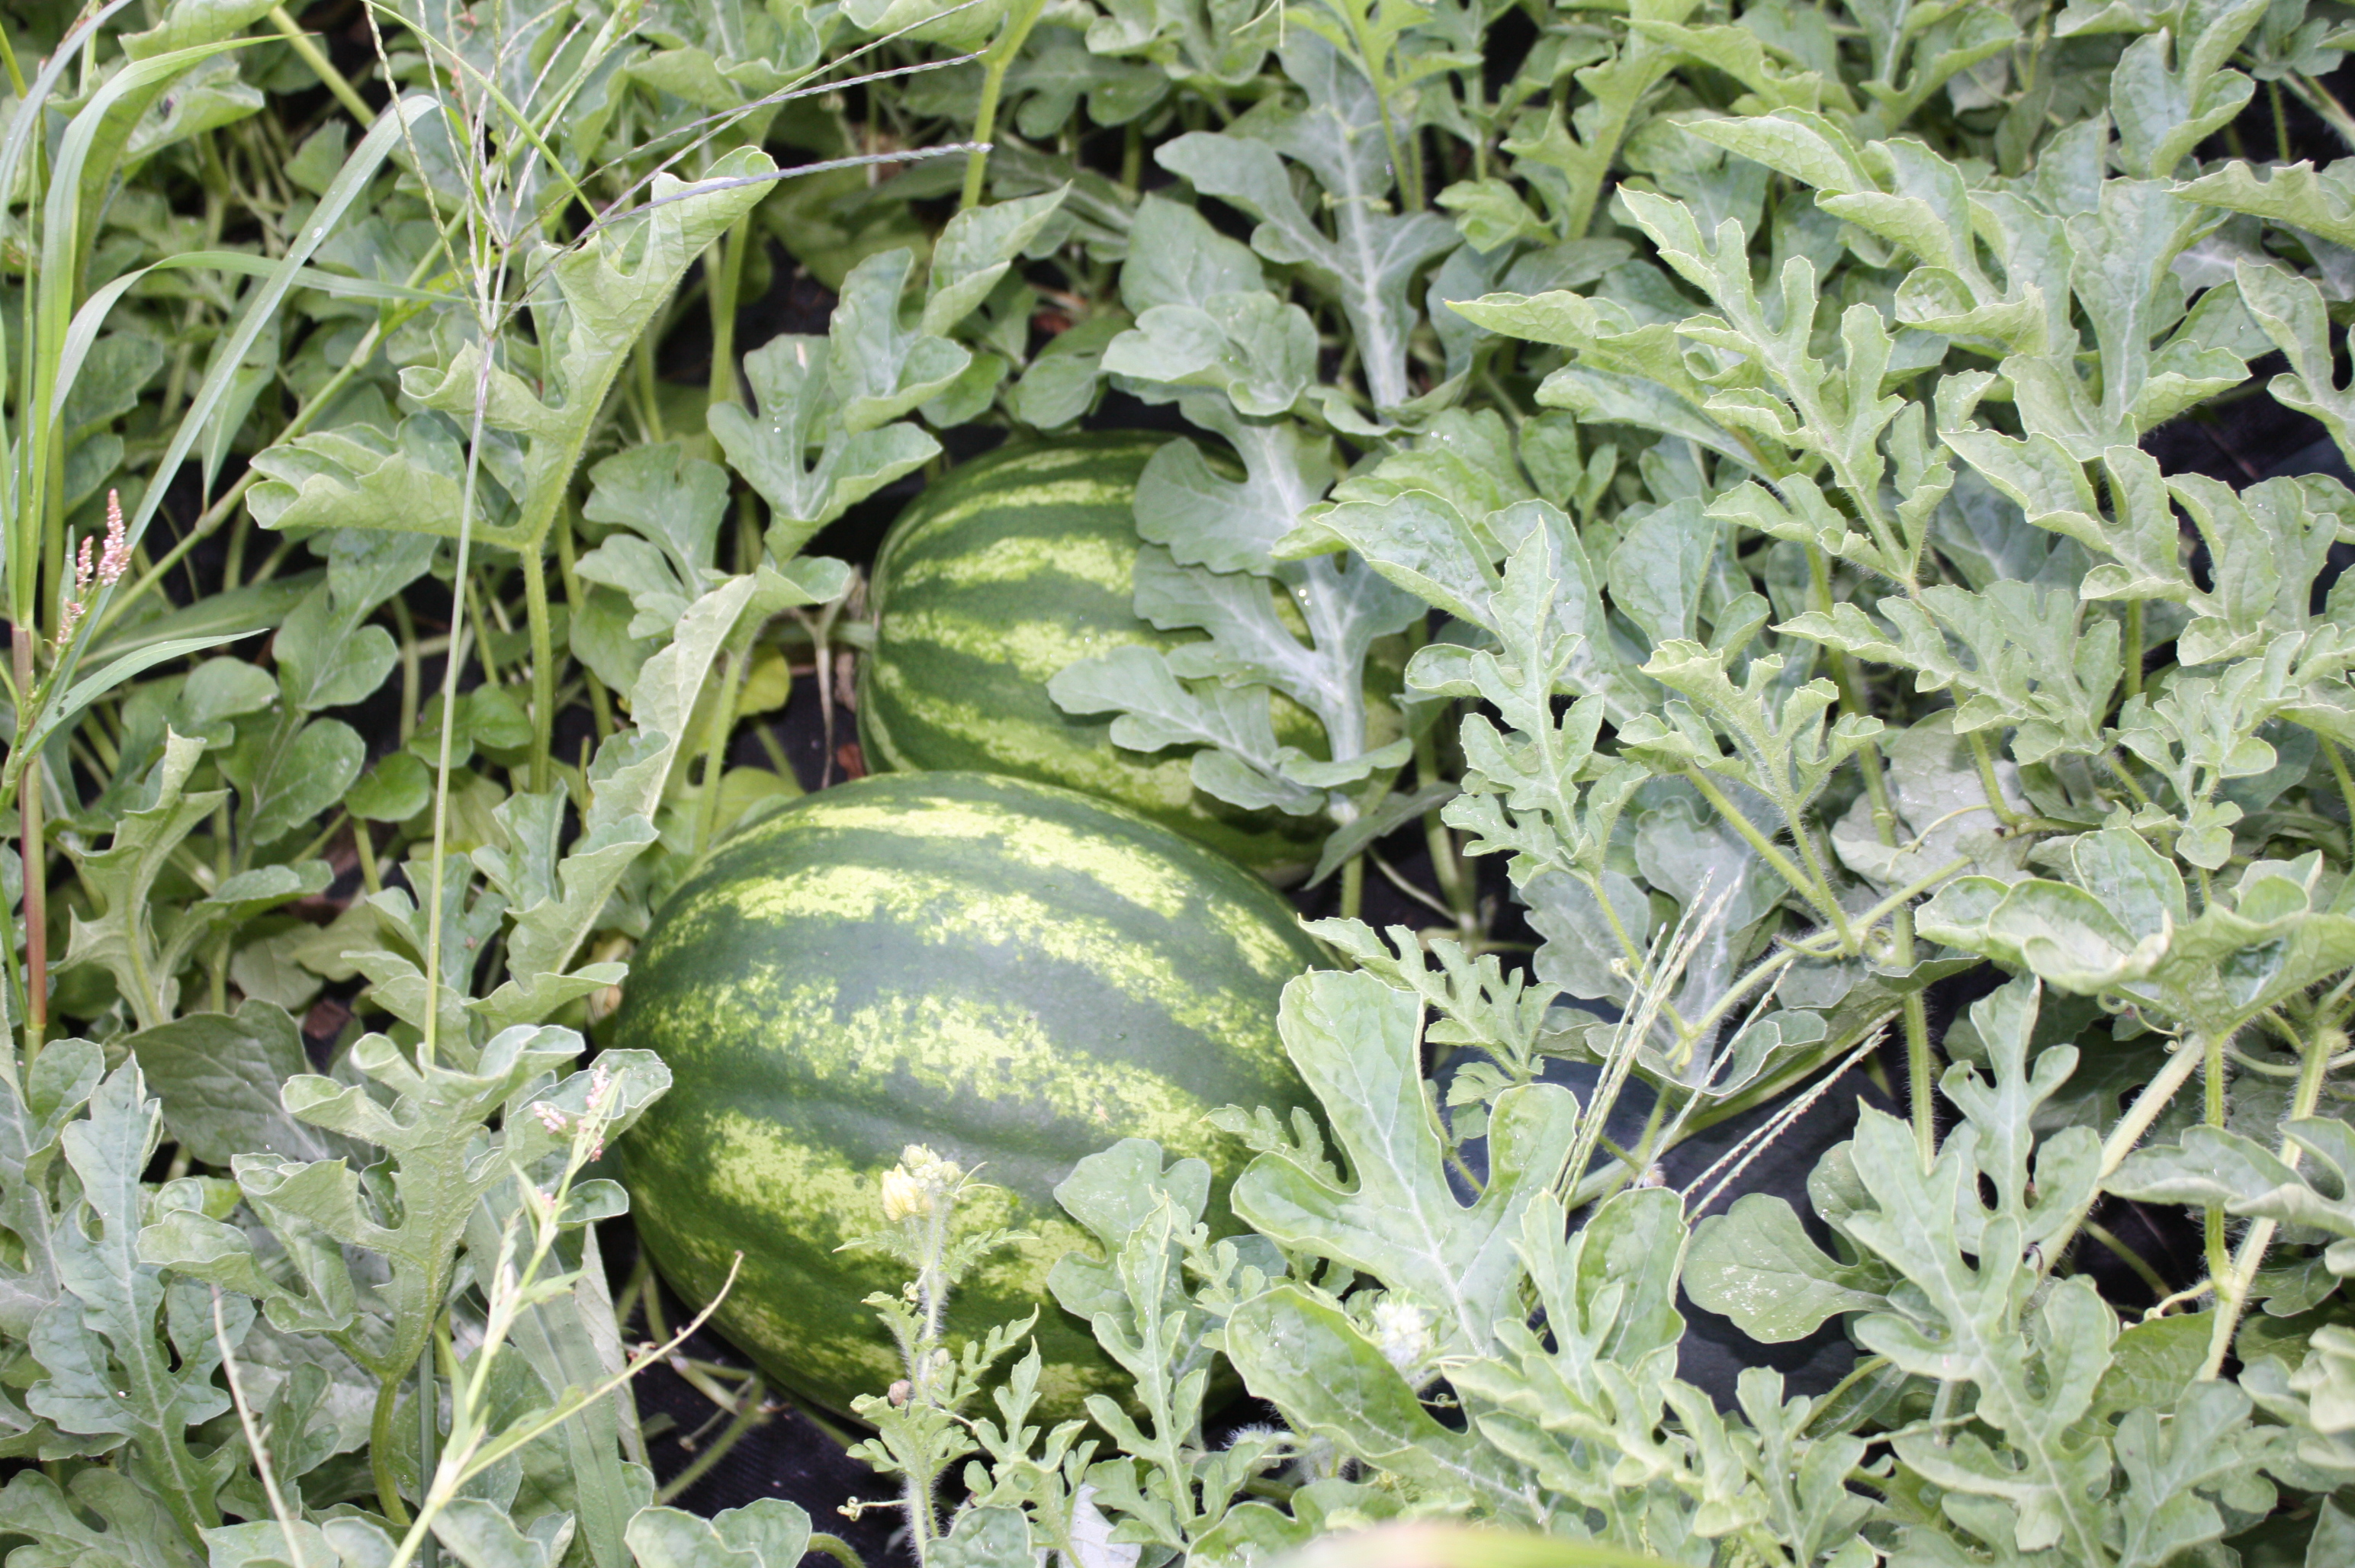
Crimson Sweet
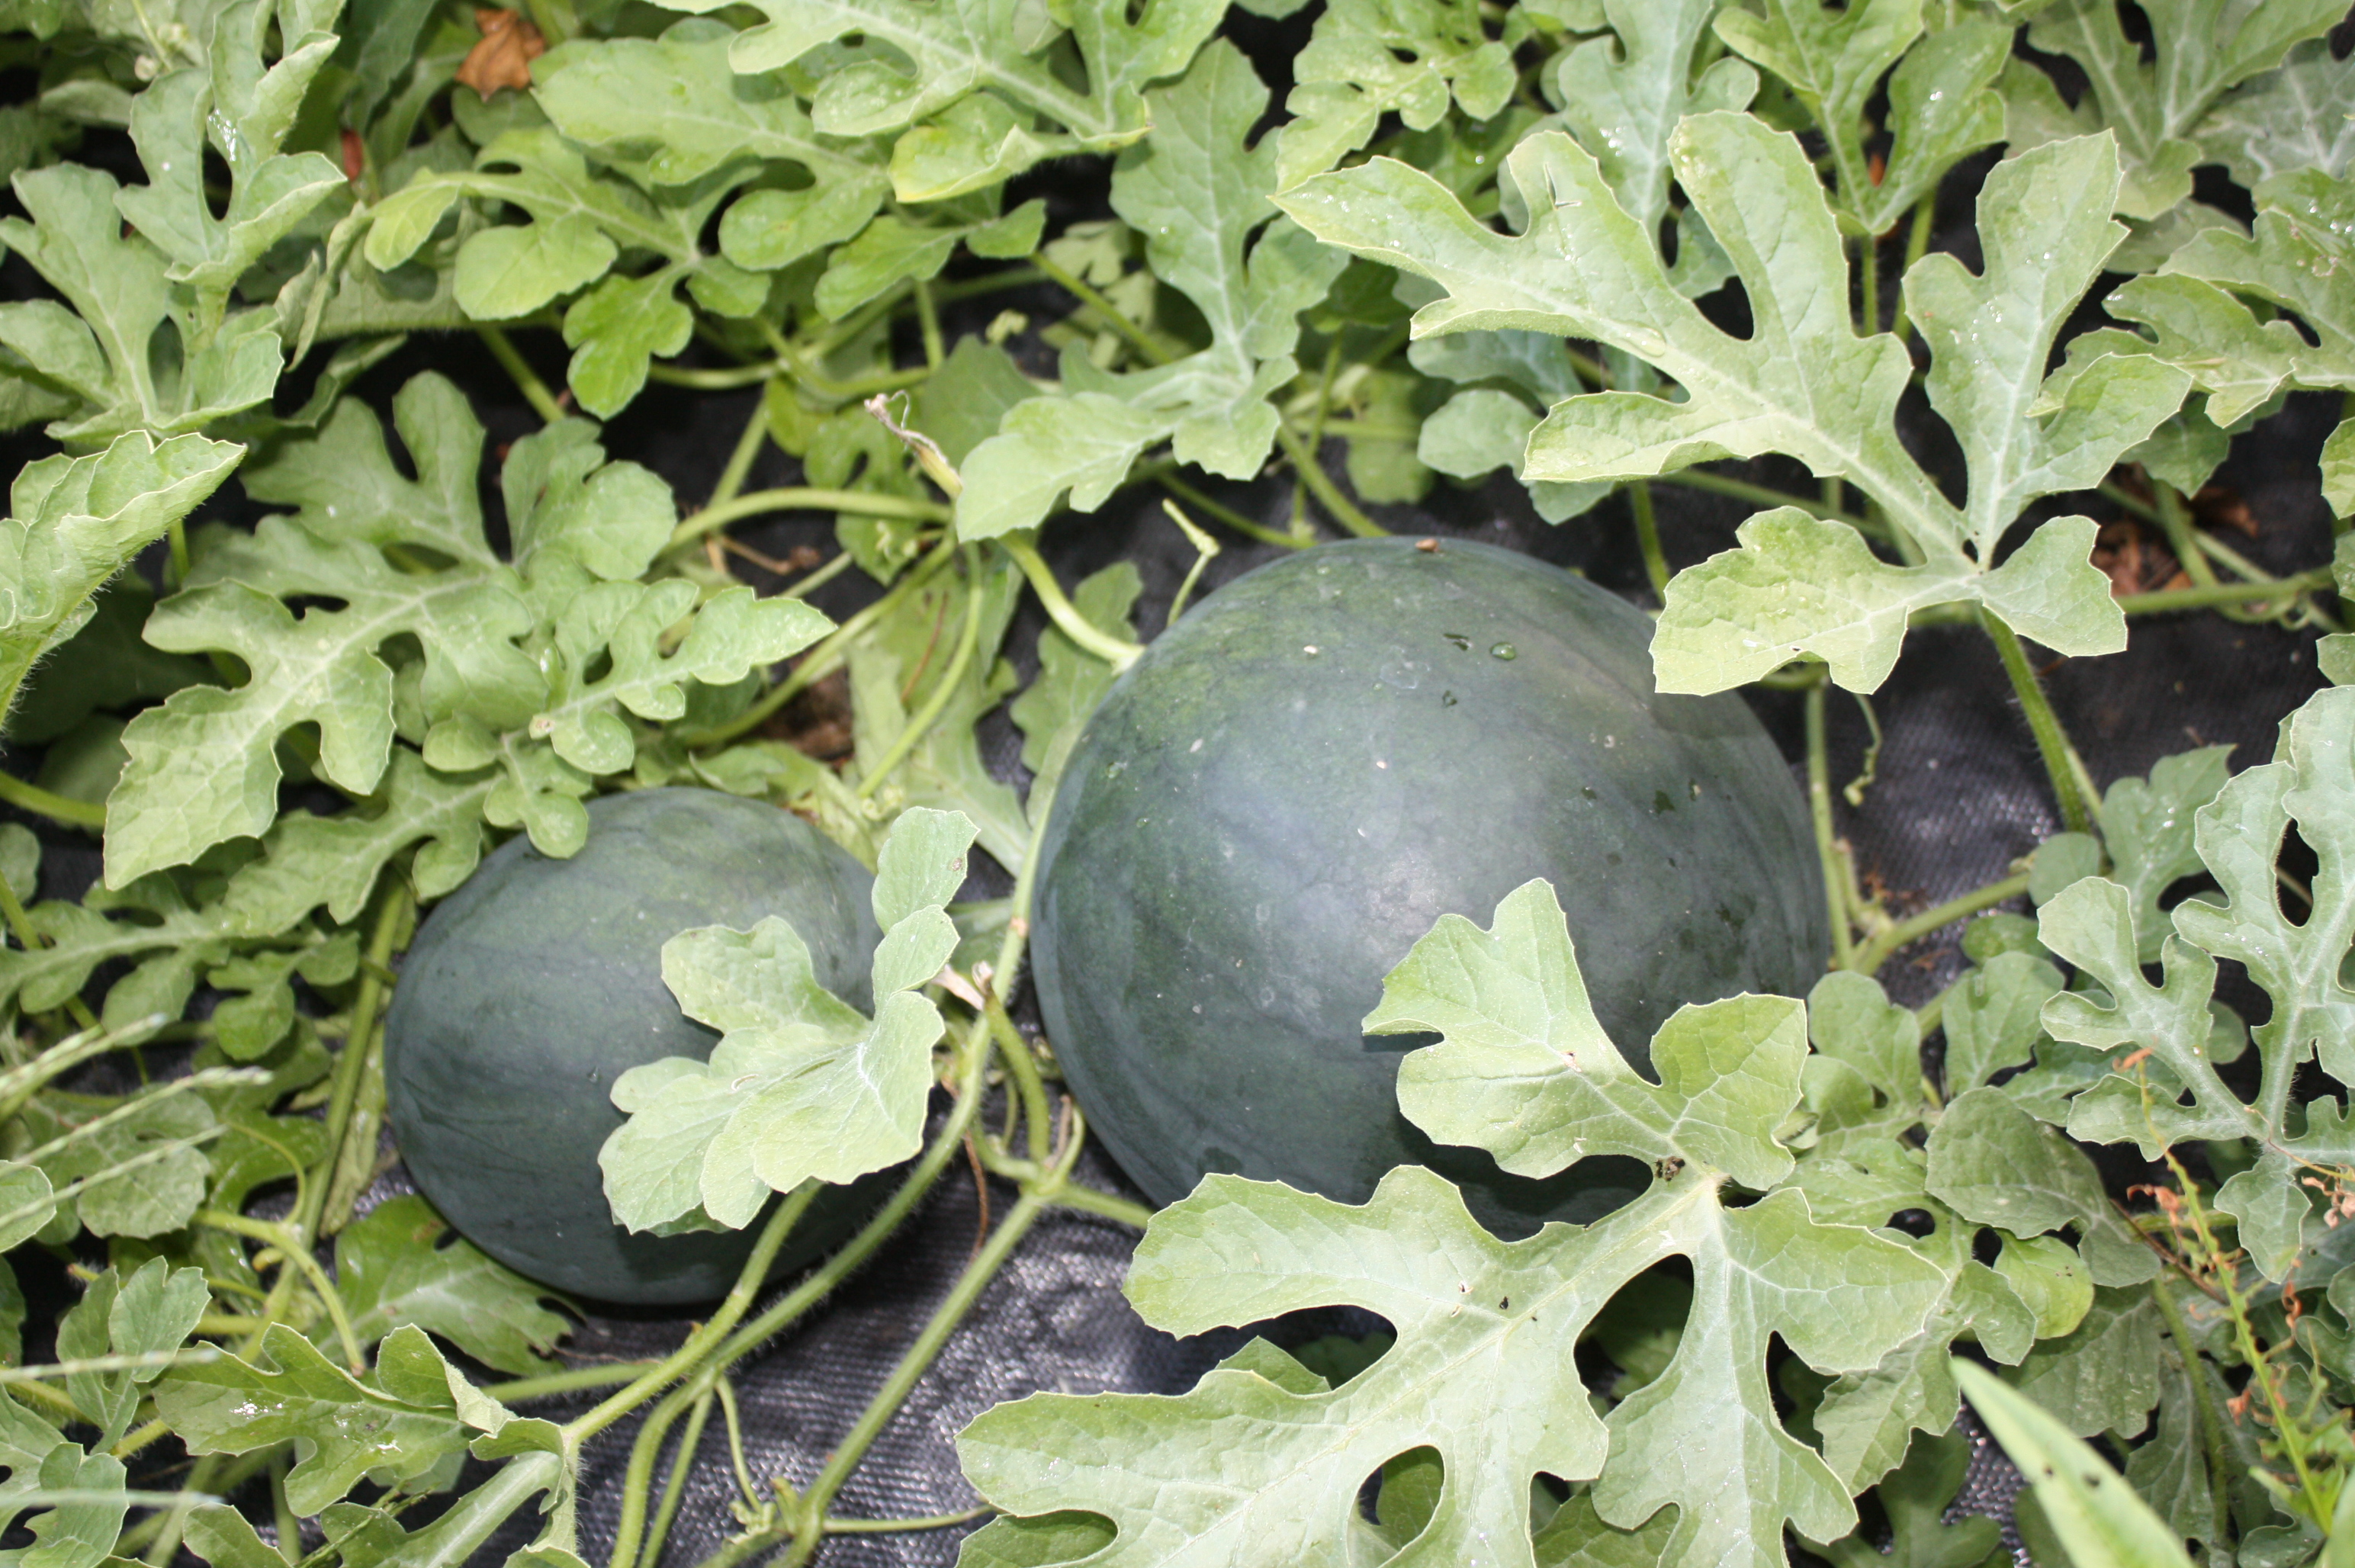
Black Tail
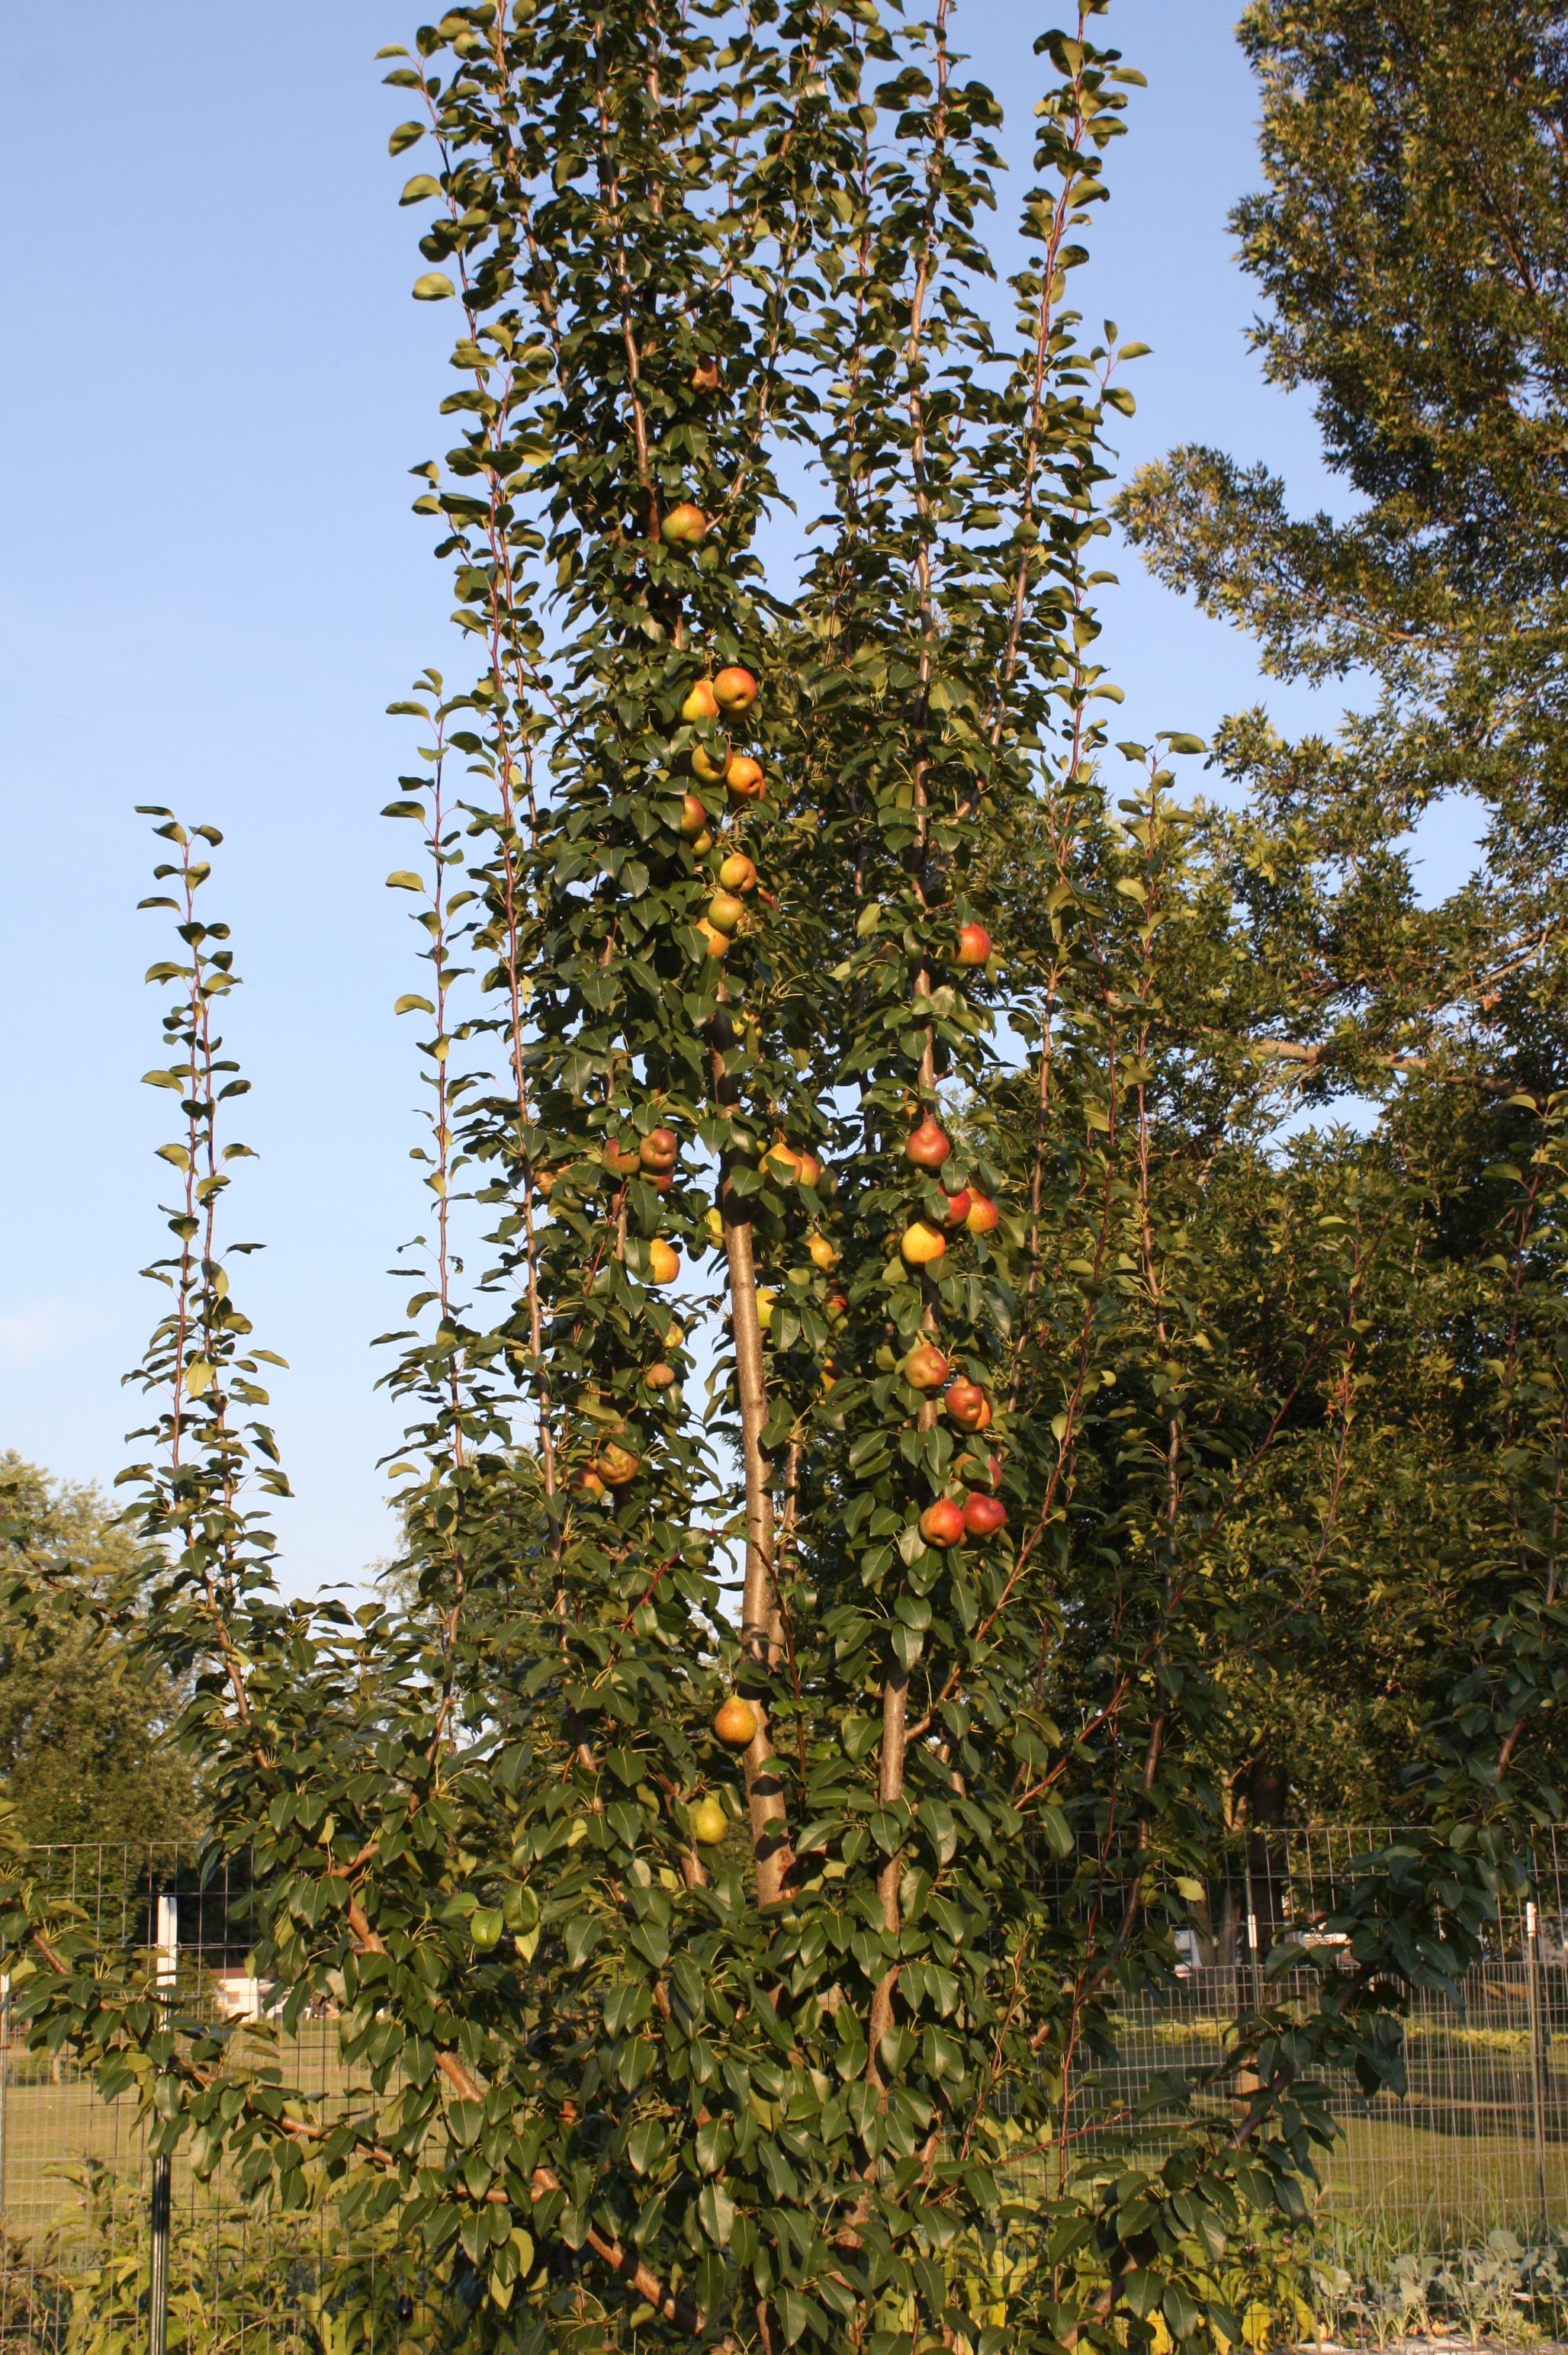
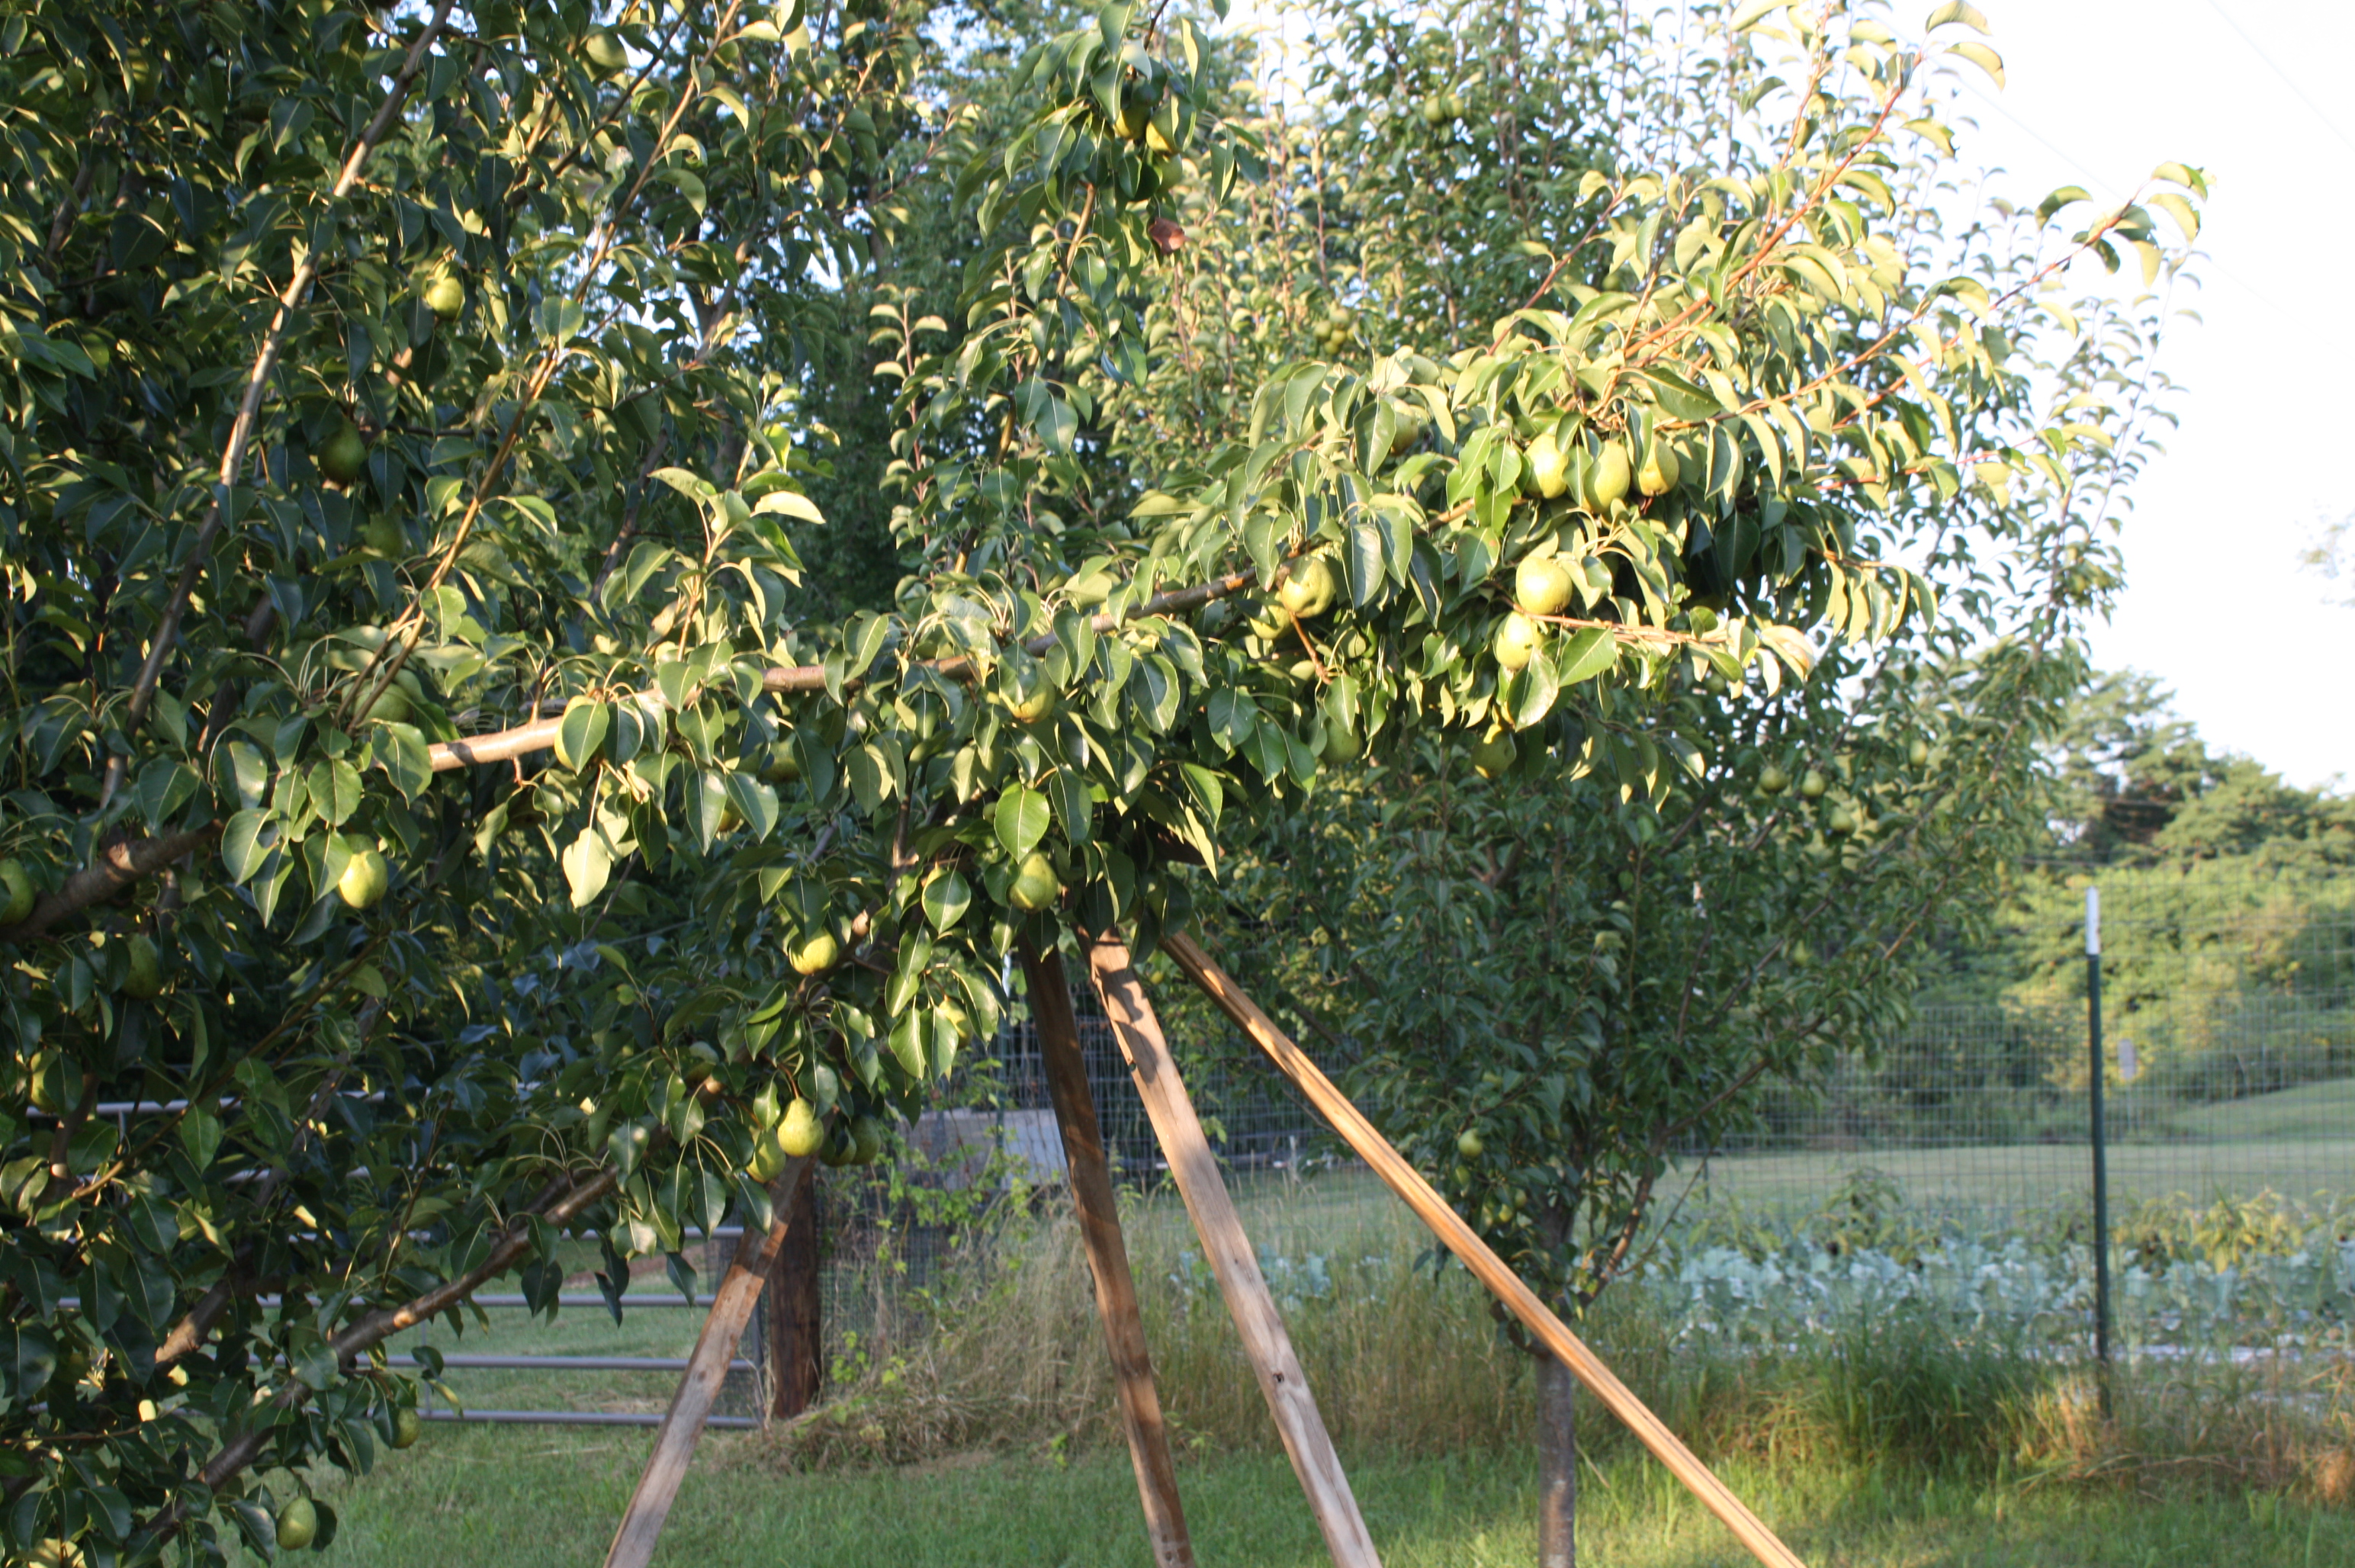
We started our pear harvest this week and they are beautiful. Pears will be in the boxes soon. Last year we did not have a single fruit.
We had a nice fruiting again this week of Shiitake Mushrooms they will be available in the “extra” box at both sites.

WHAT IS IN YOUR BOX
Average box weight this week is a whopping 17.05 pounds! 699.05 pounds of deliciousness out this door today.
Corn-The last week of this delicious corn from Scott’s relatives.
Leaf Lettuce-A big bag of a delicious mix.
Head Lettuce too!-A nice crisp head.
Celeriac Root-A funny looking root with delicious celery flavor. Cut outer skin and enjoy the core fresh in salads or sauté in stir fries.
Kale-A nice big bunch of assorted varieties. Try Kale Crisps if you have a chance this week. A favorite treat at our house.
Cucumbers-A few long Asian or Europeans and our snacker medley bag of assorted smalls.
Zucchini- Assorted long slender beauties and patty pans
Potatoes-3 pound mesh bags for everyone.

A heart shaped potato.

Someone will get this surprised tucked in their box.
Onions-A few of the tasty mild fresh eating variety. Store in the refrigerator.
Peppers-All Sweet Peppers this week. NO hot.
Cherry Tomatoes-Colorful Pint of heirlooms.
Slice/Paste Tomatoes- These will be available in the “extra” area at both pick up locations. Choose what you wish.
BEST GUESS FOR NEXT WEEK-tomatoes, watermelon, basil, potatoes, collards, pears, cucumbers, zucchini, peppers

Just picked corn the perfect breakfast!

Maeve’s breakfast this morning!
Thought everyone is running out of ideas of what to do with all that zucchini…..And remember take a peek at Pinterest. Tons of great recipes to explore.
Zucchini Noodles/Ribbons
From the blog Fudge Ripple

From the blog Vittles and Bits
Baked Zucchini Chips
- 1 zucchini
- canola cooking spray
- seasoned salt, or other seasoning(s) of your choice
Preheat oven to 225 degrees Fahrenheit. Line a baking sheet with parchment paper or nonstick foil, and spray with canola oil. Set aside.
Slice zucchini into thin medallions, about the thickness of a quarter. (You can either use a knife & a very steady hand, or a mandoline slicer.)
Lay out slices on prepared baking sheet, and spray tops lightly with additional cooking spray. Sprinkle with seasonings of your choice. (A note on seasoning, however – use LESS than what seems appropriate. These shrink considerably in the oven, and if you use too much it gets very concentrated. It’s better to end up underseasoning and add more later.)
Place in preheated oven and bake 45 minutes. Rotate baking sheet, and bake an additional 30-50 minutes, until chips are browned and crisped to your liking. These are best eaten within a couple hours of removing from the oven, as they start to get chewy if left out. One zucchini makes one serving (1/4 C. – 1/3 C. of chips depending on the size of your squash).
Original Recipe
Pasta with Zucchini, Tomatoes and Creamy Lemon-Yogurt Sauce
Adapted from Jillian Michaels’ “The Master Your Metabolism Cookbook”
Serves 4 (calories: 303 per serving)
- 8 ounces whole wheat linguine (or your pasta of choice)
- 1/2 cup nonfat plain Greek yogurt
- 1/4 cup grated Parmesan cheese
- 1 teaspoon grated lemon zest
- 1/4 teaspoon salt
- 1/4 teaspoon ground black pepper
- 1 tablespoon olive oil
- 3 medium (8-ounce) zucchini, cut into thin strips (3 inches long and 3/4 inch wide, like a big stick of gum)
- 2 garlic cloves, thinly sliced
- 1/2 pint grape or cherry tomatoes, halved lengthwise
- Bring a large pot of water to a boil. Add the pasta, and cook about 9 minutes, or according to the package directions. Remove 1/4 cup of the cooking water, and set it aside. Drain the pasta. Set aside.
- Meanwhile, in a large bowl, stir together the yogurt, Parmesan, lemon zest, and salt and pepper. Set aside.
- In a large skillet, heat the olive oil over medium-high heat. Add the zucchini, and cook just until wilted, flipping them over occasionally with a spatula. (The zucchini will be soft and somewhat see-through.)
- Use a spoon or spatula to push the zucchini aside so a space on the bottom of the pan is clear. Add the garlic, and cook for 15 to 30 seconds, until golden but not really brown.
- Mix the garlic into the zucchini.
- Stir in the tomatoes and cook until softened, about 2 minutes.
- Transfer the zucchini mixture to the yogurt mixture, and stir to combine. Add the drained linguine, and toss gently to combine. Add the reserved pasta cooking water a tablespoon at a time, if necessary, to thin it. Divide among four bowls and serve.
Nutritional Info (Per Serving): 303 calories, 7g fat, 14g protein, 49g carbs and 255g sodium.
All content © Ezra Pound Cake


![chinese cabbage e1360295164710 {mustard glazed chinese cabbage}[gluten free]](https://i0.wp.com/starvingchef.com/wp-content/uploads/2013/02/chinese-cabbage-e1360295164710.jpg "chinese cabbage for chinese new year by starvingchef")